|
|||
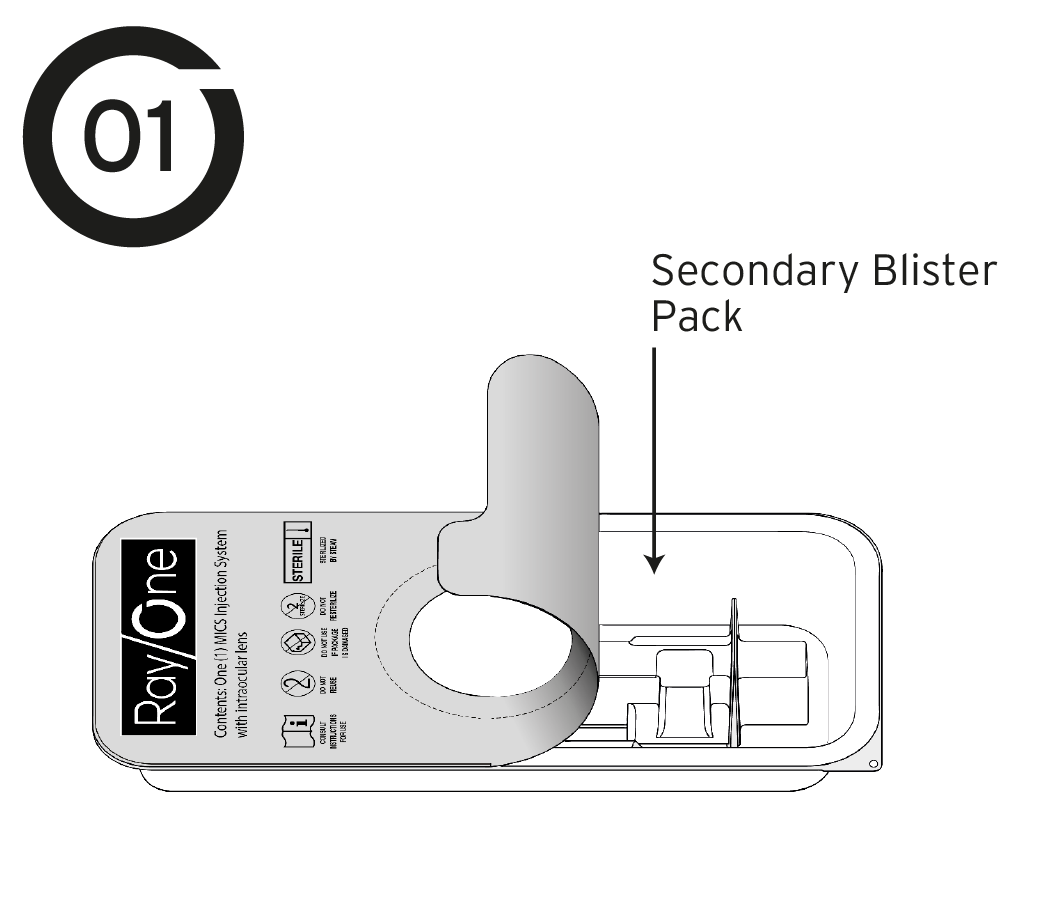
Completely peel back the lid of the first blister pack. |
|
|||
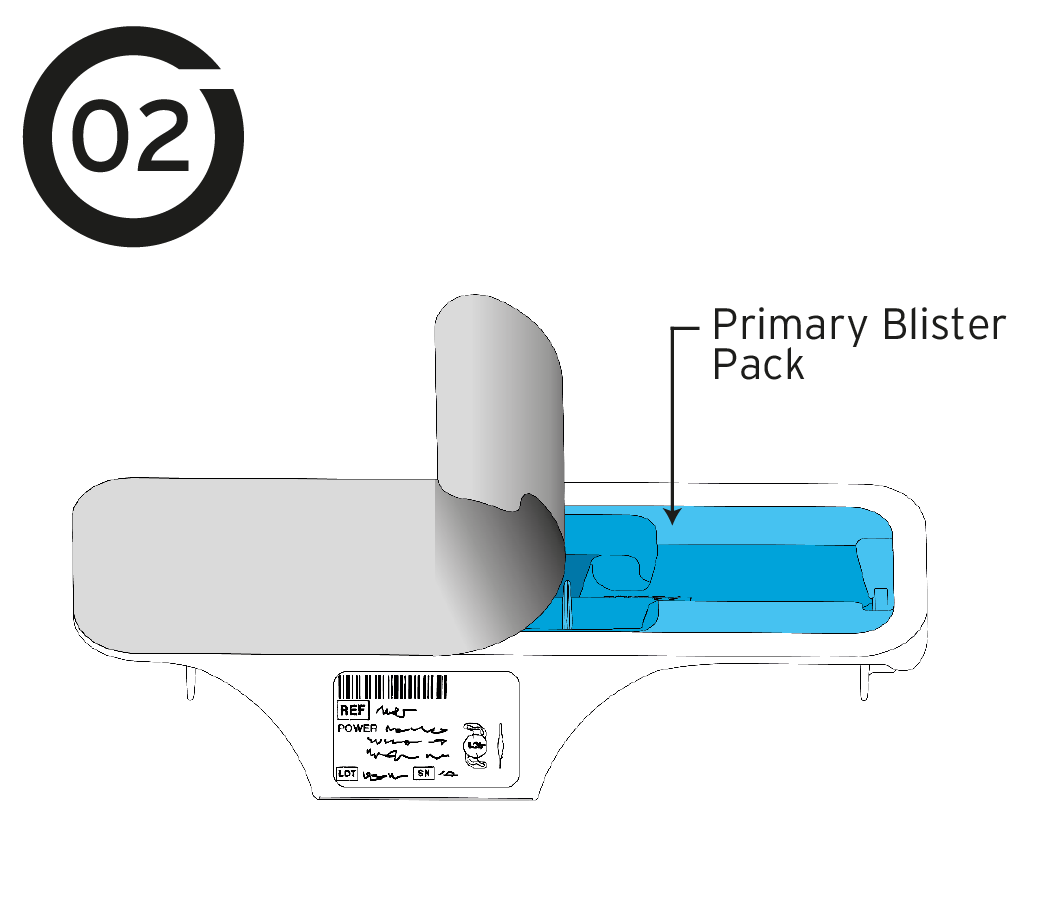
Carefully peel back the lid half way down the second blister pack. |
|
|||
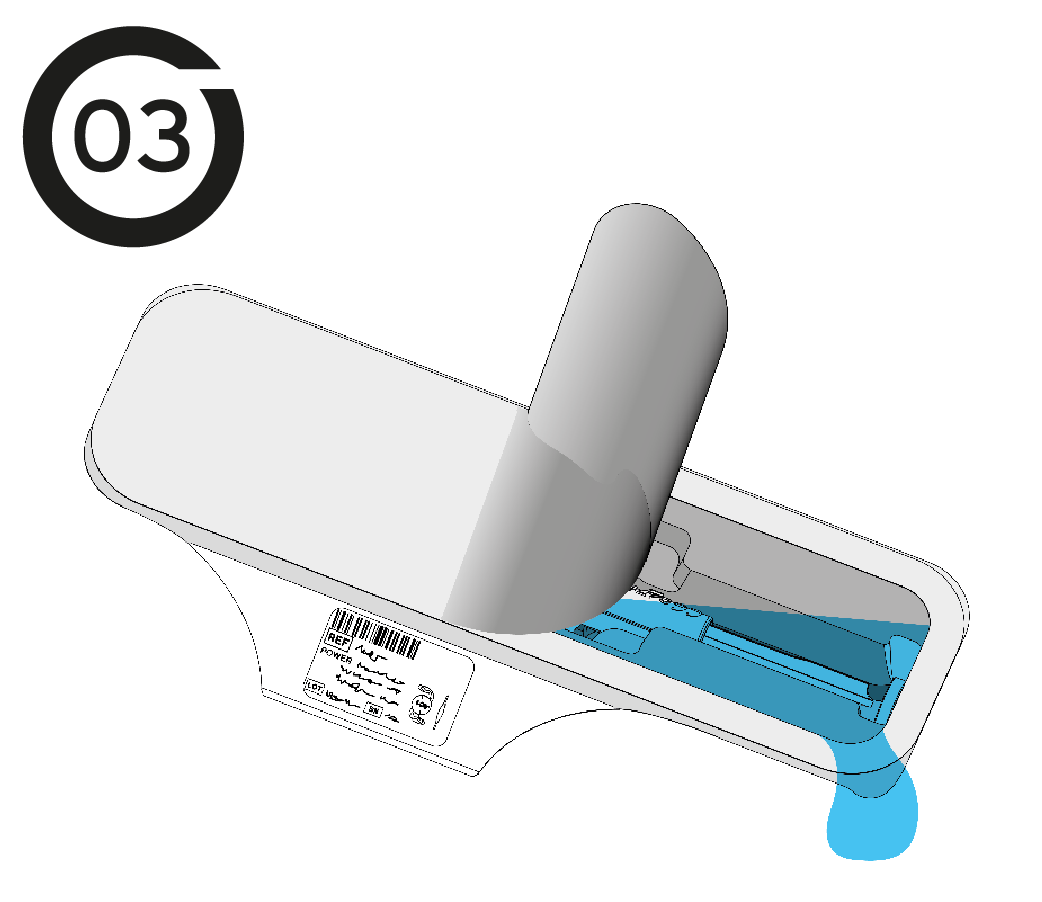
Carefully drain the saline from the blister tray and peel off remaining lid. Do not remove the injector from the blister tray.For hydrophilic lenses, do not wait more than 3 minutes before adding OVD – dehydration risk. |
|
|||
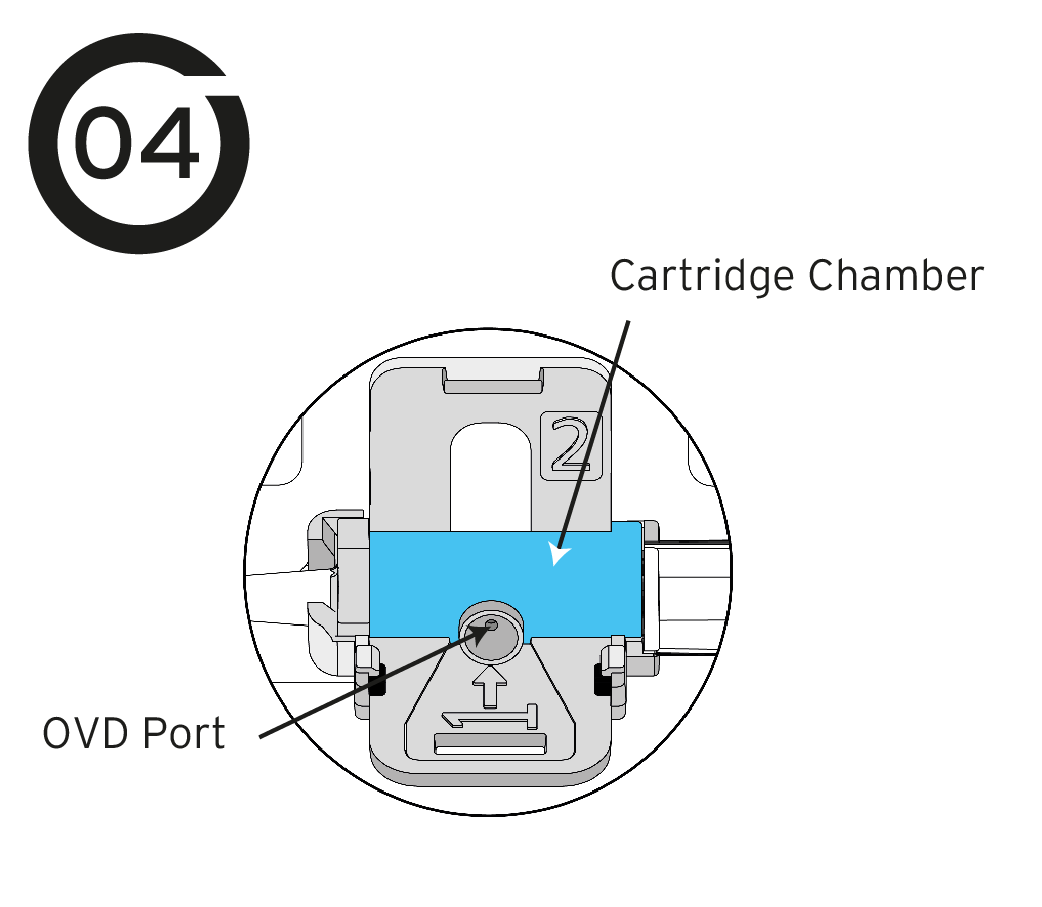
*IMPORTANT*Insert the viscoelastic cannula into the opening marked with an arrow on the cartridge and apply sufficient OVD to completely fill the cartridge (equivalent to approximately 0.3 ml). NOTE: Rayner’s patented “Lock & Roll” injector technology uses the mechanical force of OVD inserted into the indicated port to move the IOL from ‘storage’ to ‘roll ready’ position at the bottom of the cartridge; do not add OVD directly via the nozzle tip. |
|
|||
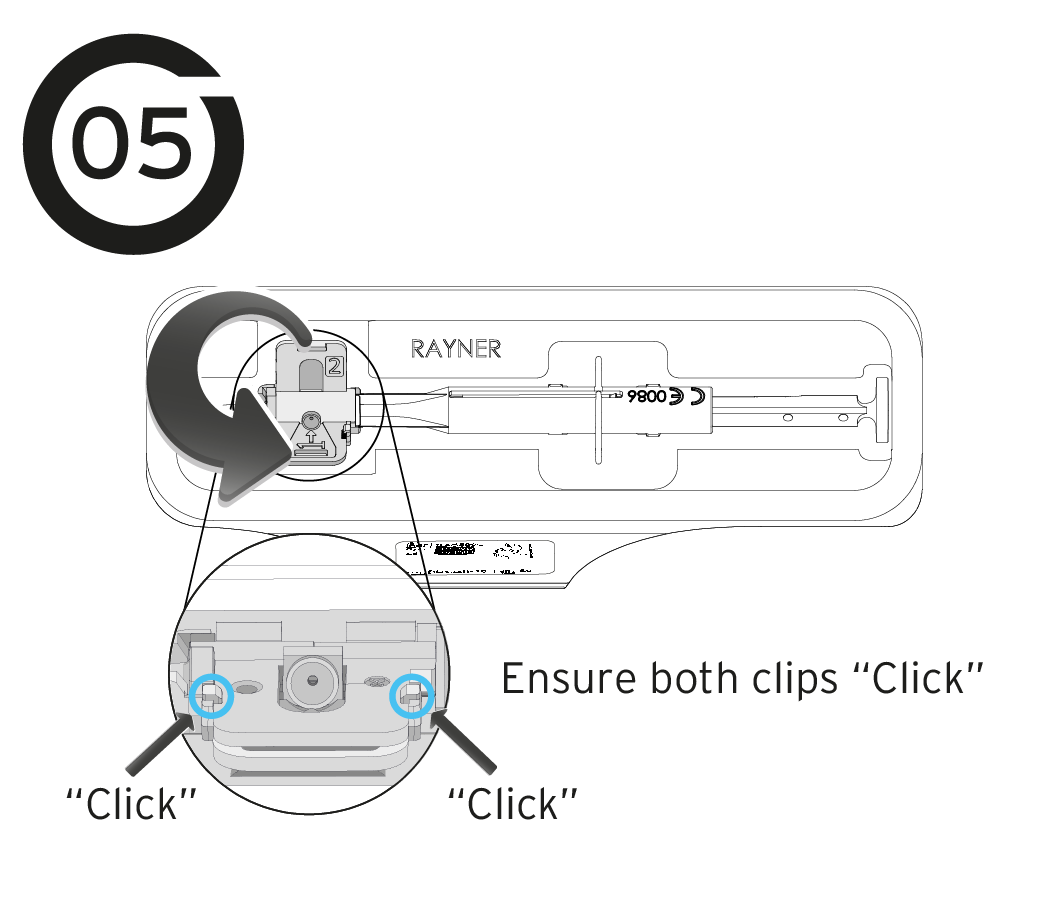
Keep the injector in the tray and close the cartridge firmly together by pushing the moving half of the cartridge (labelled 2) against the fixed half until you hear it click closed.
|
|
|||
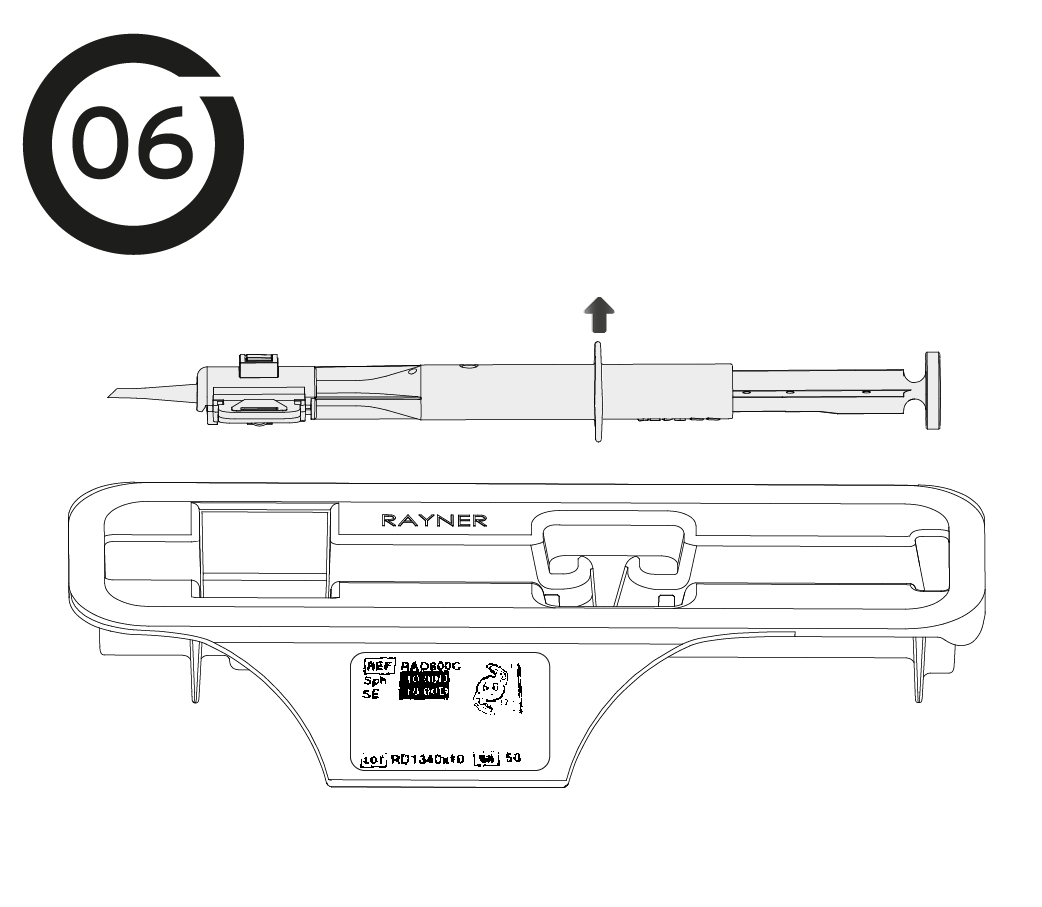
Gently lift out the injector from the tray. |
|
|||
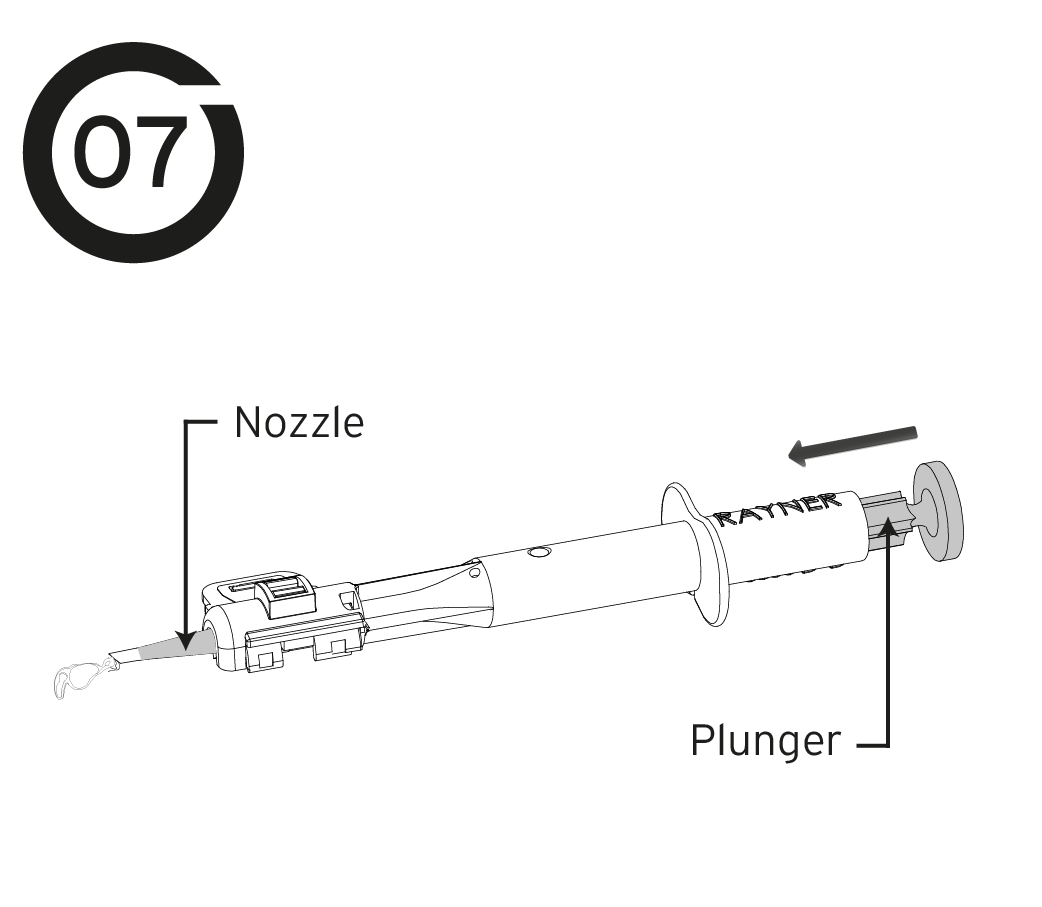
Press the plunger in a slow and controlled manner. If excessive resistance is felt this could indicate a blockage; discontinue use of the product and return the product and all packaging to Rayner. In the case of IOL rotation during ejection from the nozzle, gently rotate the injector in the opposite direction to counteract any movement. |
|
|||
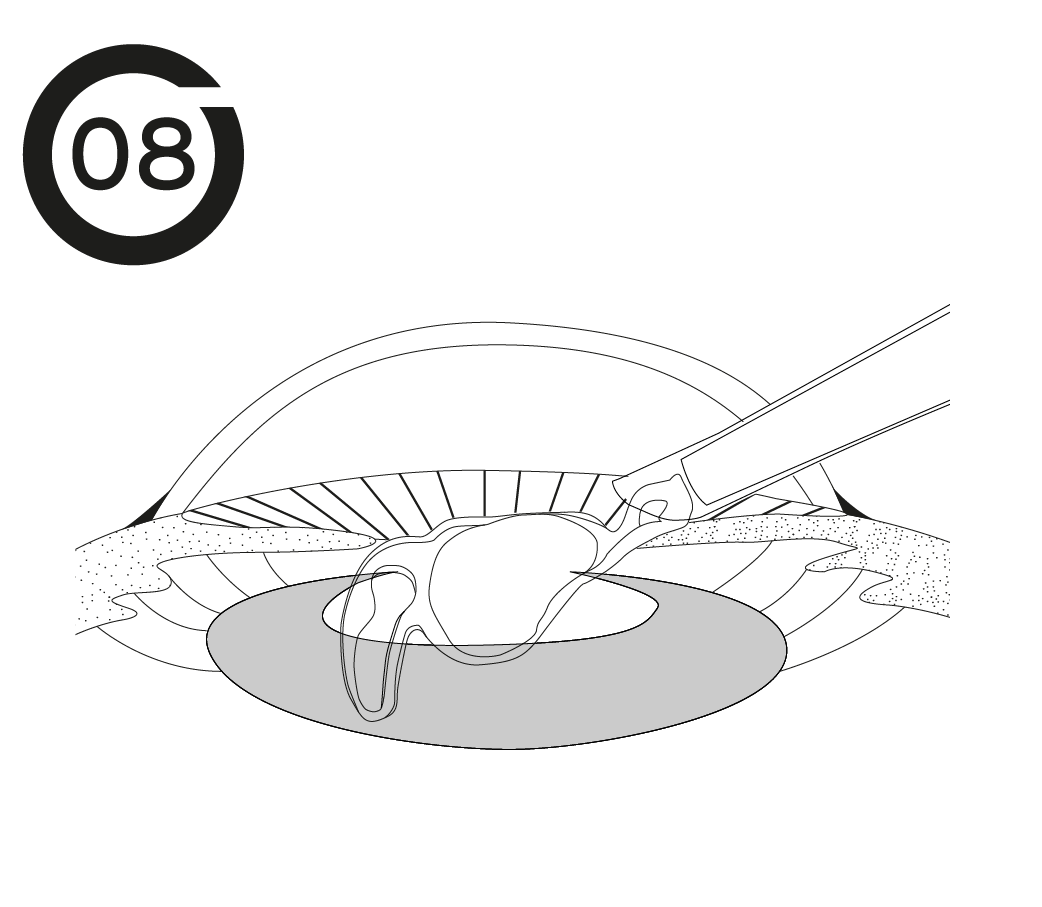
Stop depressing the plunger when the IOL exits the nozzle. Discard the injector after use. Following implantation, irrigate/aspirate to eliminate any OVD residues from the eye, especially behind the IOL. |
|
|||
| • Do not remove the saline from the blister pack too early – if you peel back the lid, drain the saline, add the viscoelastic and then “click” shut the clips within three minutes then the lens will not dry out and can be used as required during surgery.
• Make sure that injector preparation takes place with the injector securely in the blister tray. Only remove the injector once the cartridge wings have been closed. • Keep the blister tray on a flat surface whilst filling the injector cartridge chamber with viscoelastic. Fully fill the injector lens cartridge chamber with viscoelastic using the OVD Port only. • Inject the lens with the injector tip bevel down – this will ensure the lens injects on a flat plane. • Inject the lens with a smooth and confident thumb press on the plunger, slow down the injection when the leading haptic and 50% of the optic has been implanted – this ensures the lens will be implanted on the correct flat plane. • To implant the IOL (including haptics) into the capsular bag in a single movement, keep the injector tip over the capsular bag for the full insertion. Do not retract the plunger as the lens is being implanted. Also, steepen the injector angle towards the end of implantation. |